I've lived on saltillo tile (terra-cotta tile) floors for over twenty years. I love it so much I just had it installed in our new house. It does take some extra care to keep it looking nice and I had a difficult time finding information about how to strip and seal it because there are companies that base their whole business on saltillo tile care, and they keep their secrets closely guarded.
Saltillo tile is a type of terra-cotta that originates in Saltillo, Coahuila, Mexico. They are made from quarried clay that is highly porous.
The most important thing to keeping your tiles looking great is: Keep them sealed!!!
Second most important thing: Use a water based sealer, NOT EPOXY!!!The water based sealers don't hold up as well as epoxy and you'll be applying a new coat every year or so (depending on foot traffic), BUT when your seal coat is getting dirty and grimy the only way to really clean it is to strip it all off. The floor strippers that sell over the counter will only work on water based sealers. ALSO, water based sealers are so easy to apply and clean-up is a snap. *I've heard that sometimes the only way to remove an epoxy based sealer is to basically grind/sand it off. At that point it would be cheaper just to replace the entire floor.
I just recently stripped and re-sealed about 1,000sqft of 30 year old saltillo tile and I had a difficult time finding an over-the counter floor stripper that worked. Because of environmental standards and liability issues, the strippers keep getting weaker and weaker. So if you find a stripper that works, stock up!!
I did find a good floor stripper at Home Depot (after spending $100 on useless strippers and chemicals), but I had to use it at full strength (against the label's instructions) to get it to work.
Dirty saltillo floors that look hopeless, ruined, dark, and in need of being replaced, can usually be brought back to life with a good stripping. Underneath that dirty sealant is a "like-new" saltillo tile.
Here's what I started with:


This Zep Heavy Duty Floor Stripper is the only floor stripper ( Home Depot sells it for about $10 a gallon) that I found to work, but I had to use it full strength to get any results. The instructions say to dilute 32 ounces with 1 gallon of water for heavy duty stripping. That didn't put a dent in my sealer.
*****************************************************************************
** Products I tried so that you don't have to **
Lacquer thinner- worked somewhat but was a sticky mess and I had to spend about 10 minutes per tile to totally strip it.
The three products below.....totally useless!!

Otherhazardous products I tried that did NOTHING to remove the sealer were: Liquid Plumr, extra strength engine degreaser, lye, bleach, several types of paint removers, deck wash, deck stripper, denatured alcohol, every Klean Strip product, and a few other very toxic and dangerous chemicals...
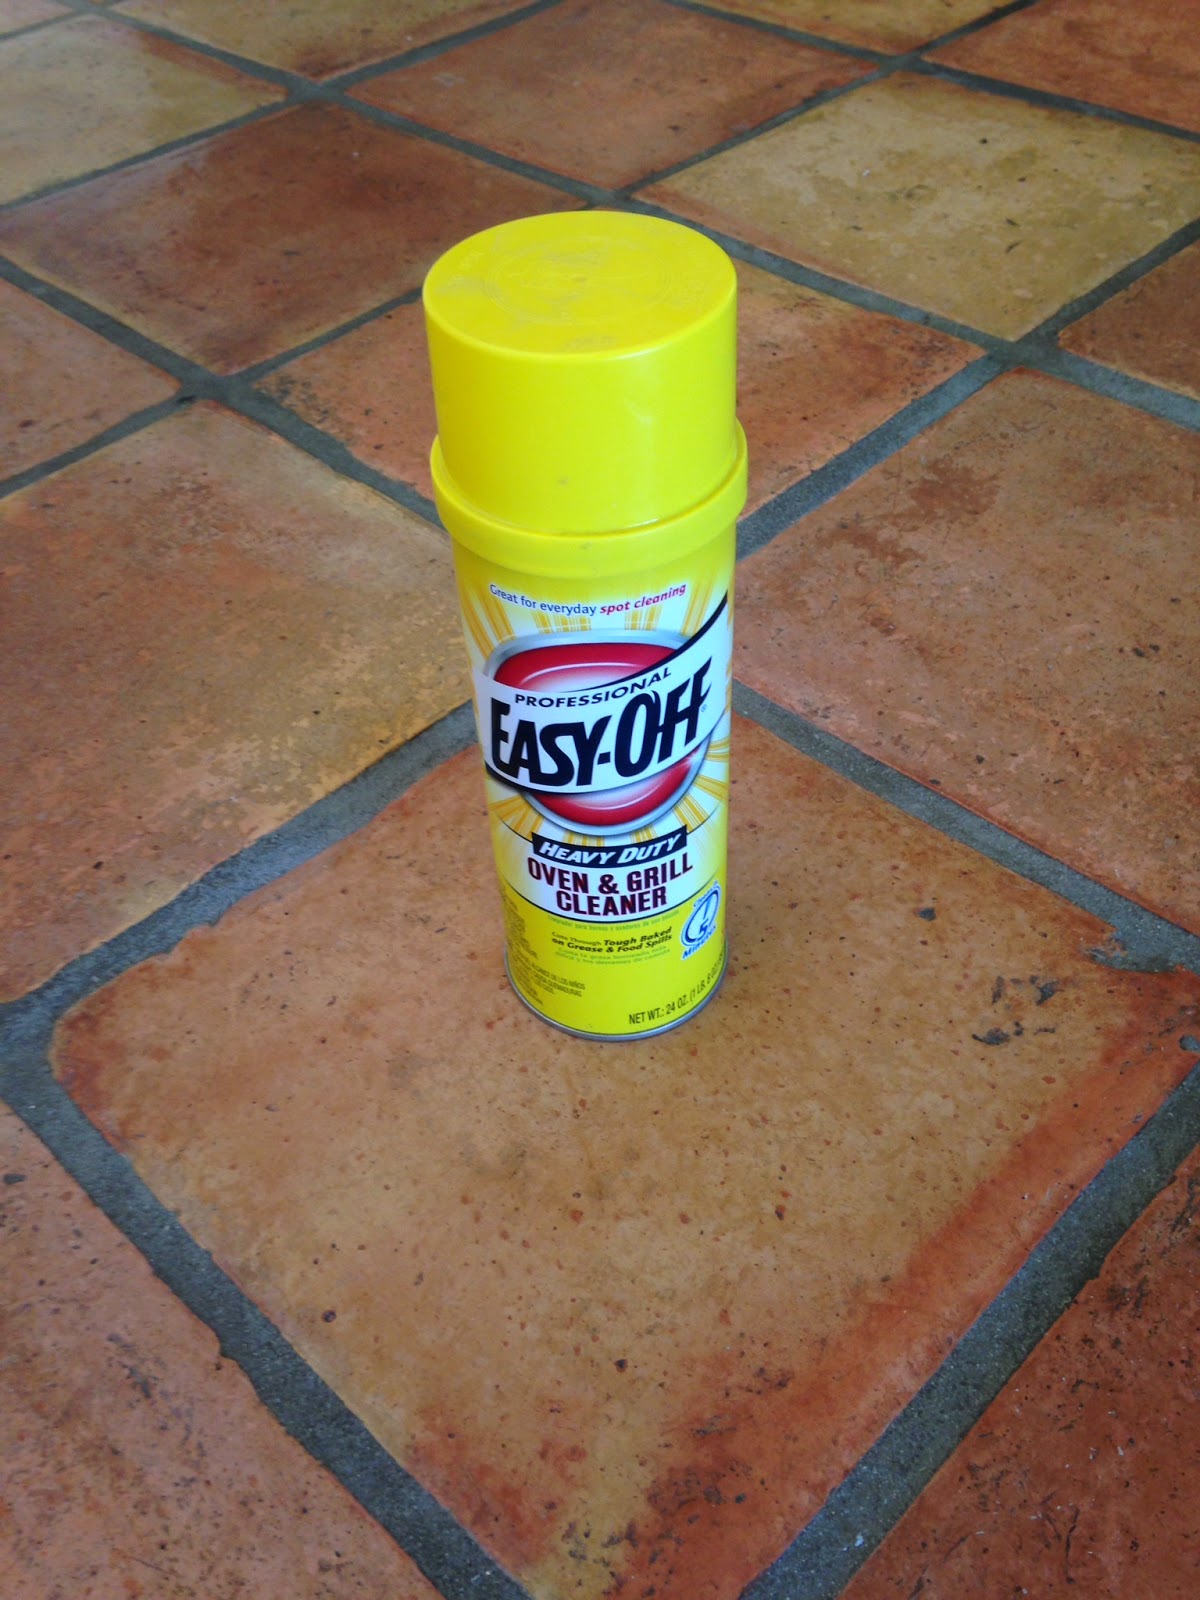
I did find that Easy-Off oven cleaner worked to take the sealant off and wasn't really messy or sticky. Totally NOT it's intended purpose!! Terrible toxic fumes, I'm sure. And it's probably illegal to use it in this manner for most parts of the U.S. I don't recommend it AT ALL, but sometimes desperate times call for desperate measures and I thought I'd share my findings. Use at your own risk. :)
**************************************************************************
*****************************************************************************
** Products I tried so that you don't have to **
Lacquer thinner- worked somewhat but was a sticky mess and I had to spend about 10 minutes per tile to totally strip it.
The three products below.....totally useless!!
Other
I did find that Easy-Off oven cleaner worked to take the sealant off and wasn't really messy or sticky. Totally NOT it's intended purpose!! Terrible toxic fumes, I'm sure. And it's probably illegal to use it in this manner for most parts of the U.S. I don't recommend it AT ALL, but sometimes desperate times call for desperate measures and I thought I'd share my findings. Use at your own risk. :)
**************************************************************************
I didn't rent or use any commercial types of floor polishers or sanders. No machines. This was good old fashioned- get down on your hands and knees and scrub.
I only worked on four tiles at a time. I put it generously on four tiles using a scrub brush and let it sit for about 30 seconds and then start scrubbing. You won't have to scrub very hard, you'll see the sealant start balling up.

Above is the stripper (full strength) applied liberally to a tile. Let it sit for about 30 seconds.
Below: after 30 seconds start scrubbing with a scrub brush (any kind of semi-firm scrub brush is good) and you'll see the sealant start to come up. All the white chunks below is the old sealant.


Wipe it up with a wet rag. You may have to repeat these steps for tiles that have more layers of sealant or for stubborn areas.


Let it dry and see how it looks. Once all the stripper is removed you can scrub the tile and grout with some soapy water to clean it up a bit more.
During stripping


After the sealant is removed the tiles should look dull, like below.

Above you can see there are still some shiny spots where the sealer didn't come off. There might be some areas where the sealer just doesn't want to come up. It's fine, just get most of it.
After you're done stripping the entire floor give it a good mop with water and let dry completely before sealing.
Congratulations!! The worst part is over!!
Now on to sealing......which is so much easier that stripping!
Congratulations!! The worst part is over!!
Now on to sealing......which is so much easier that stripping!
I have a post on sealing brand new saltillo tile here, but this is how I sealed these older tiles. Remember to use a water based sealer!!! Below is the sealer I used from Home Depot, but you can find a sealer at any home improvement store. This one has a wet-look, but there are also low gloss sealers. Choose whatever you like.


I put in on using a mop and basically just apply it the same way you would if you were mopping your floor with water.
It will have dark patches and look streaky at first, but that will disappear as it dries.

These streaks will not be noticeable when dry.

Dark patches will lighten when dry.

Above are the tiles still wet with one coat of sealer. Below is two coats after they've dried (here in dry/warm Arizona it takes each coat about 4 hours to totally dry).


Finished floor with two coats of sealer. If you have brand new tiles I recommend three coats because most of the first coat will be totally absorbed by the tiles.


Feel free to email me with any questions you may have!! My email address is in the comment section at the bottom of this post.
***
Here are a couple more pictures to show how the high gloss sealer, over time and with foot traffic, buffs out into a more eggshell gloss.

The tiles above have the "high gloss" sealer that is approximately 1 year old, but I find that they dull to the eggshell finish in a couple of weeks; less time even if it's a high traffic area. I really like this look, I'm just mentioning this in case you want high gloss and are expecting it to remain high gloss.

Picture above is "high gloss" just an hour after application.
**


