Friday, June 20, 2014

Pipe & Plank Bookshelf


To house the collection of books we've amassed, we went a bit funky and designed a pipe and wood plank bookshelf. I wanted it to be rustic so I didn't paint the pipes or finish the planks with any kind of sealer. That avoided a few timely steps(hooray!!!), but this was still a lengthy build. The wood planks took a couple of days prep work. We cut to exact length, drilled the holes for the pipe, sanded, and stained. There are seven 13ft long planks. And lots and lots of pipe. We had to go tho three different Lowe's and one Home Depot in order to get enough pipes. We used the black gas pipes except for the floor and wall flanges which are galvanized pipe-they don't sell a gas pipe flange. The final size turned out to be 13 feet wide by just over 10 feet tall. A bit taller than what we first planned, but I like the look of an empty top shelf and we needed all the other shelves to hold all the books.


pipe bookshelf, industrial bookshelf, pipe shelf, diy bookshelf, how to make a pipe bookshelf


The wood planks were from Lowe's.


 The pipes are the 3/4" so the holes had to be 1 1/8" in diameter so the pipe would fit through the hole, but (VERY IMPORTANT!) the tees would not.


pipes for building a bookshelf


All of the pipes were standard sizes except for the shelf's top 6 pipes that went to the wall flange. Those turned out to be a weird length. We had Home Depot cut and thread to size.

----------------------------------------------------------------

---------------------------------------------------------------------------


Before...


As is typical.....this took much longer to put together than we thought and we ended up making a mid-build trip to the hardware store for unexpected missing/needed parts.


First row leaning against a box to protect the wall. We built it in place because we knew that once it was built it would be too heavy to move.


The bottom two vertical pipes are 18" tall and then the rest are 12"


 Gas pipes are DIRTY!


Done building, but not attached to the wall. You can see that because the wood planks are not perfectly straight and flat (they never are) they don't sit on all of the elbows. After they were loaded with the weight of the books, they all flattened out and are straight and resting on the elbows.


It is still leaning against the cardboard box to protect the wall.


 To attach to the wall we used drywall anchors (the studs did not line up with the flanges). The screw heads that come with the anchors were too small to hold the flange so we had to add washers.

drywall anchor


galvanized flange


building a pipe bookshelf


The wood shelves are about an inch away from the wall

pipe shelf, pipe bookshelf, industrial bookshelf


pipe bookshelf, industrial bookshelf, wood and pipe bookshelf

The floor flanges are not fastened to the floor.

Below is a better visual of the dimensions:

diy pipe bookshelf, dimensions for pipe bookshelf, how to build a pipe bookshelf


The finished shelves:

pipe bookshelves, pipe shelf, industrial shelving


pipe bookshelves, diy bookshelves


iiindustrial boolshelf, pipe bookshelf, bookshelf, interesting bookshelves


***

Now we're on to closet shelving...
Nothing stylish, just functional.


Thursday, June 12, 2014

A Few Evening Pictures


I still have a lot more landscaping and landscape lighting to get to in the yard. Here is how it is looking, so far, in the evening.


swimming pool at night

Along with all of the hardwired lights, the swimming pool light is also on a dimmer. Sometimes I can get the lantern lights so dim that they look like flames or candles but I have a hard time finding a camera setting to show how it looks. I'll get my tripod out and figure it out.

Wednesday, June 11, 2014

Aerials


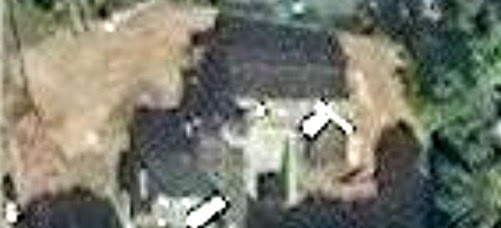
I found some aerial shots of the house being built on the internet. They are really poor quality unless you pay for them. The website is Terraserver and it seems they take aerial pictures much more often than I can find on google earth/maps or bing.


1.

2.

3.

4.

5.

6.


1. 5-03-2013
2. 11-28-2013
3. 12-22-1013
4. 3-25-2014
5. 4-21-2014
6. 5-10-2014

Here's google's most recent shot. I'm guessing it's from sometime around March 2014, the only other picture they have is of the empty lot.


***

Moving In... and It's a Mess!


Well, we aren't totally moved in. Our stuff is now split between two houses, but we are making a lot of progress and all the BIG stuff is moved....so that's something.

I've been digging holes for landscape like a madwoman. I'm sure I've dug over 100 holes in 100+ degree heat. The plants are pretty stressed and we're using a lot of water to keep them alive.

There are tons of little things still to do inside like, install doorknobs and doorstops, still waiting on a few kitchen cupboard doors to come back from the shop, finish tiling kitchen walls, get closets fitted with shelves and hanging bars, make a bookshelf.....and a bunch of other stuff that makes a house a home. It's kinda like we're "just visiting" because our clothes are in stacks on the floors of the closets and nothing really has a place yet, but it's SOMETHING!! And I'll take it any-day compared to driving back and forth, between houses, multiple times a day.


tiling the kitchen side wall
 **


painting closet doors (I finally got the size right after only 3 months!)
**


the first bits I brought over
**


 bringing the big stuff over in the U-Haul and putting the bed back together


 We just had the U-Haul for two days, so everything just got plopped in the great room.


Below is a picture I took with my phone of our old house after moving the furniture out. It makes me sort of sad...


***


 starting to get organized


 the TV room
**


boys' room
**


 guest room
**


one of the closets
**


 planting  hundreds of orange jubilee


 just some of the pots
**


paver driveway, spanish colonial house


 ***


 master bedroom


***


staining wood for bookshelves


 ***

 After many, many tries at mirrors for the boys' bathroom I finally decided on the plain 4 foot long medicine cabinet. I loved the look of the two different mirrors (below left). In the end, storage was more important than style in this bathroom without cabinets.


kohler brockway sink


kohler brockway sink


It has three mirrored doors that open

***


paver driveway


black wing chairs at dining table


wood garage doors, knotty cedar stained garage doors, paver driveway


cedar garage doors, stained knotty cedar garage doors, wood rollup garage doors


 Main hallway with office doors on the right, front door straight ahead
** 


***